Photography is an art where the beauty of real world is captured through the camera lens of the photographer. However, image deformation in various degrees may occur without the control of photographer.
Perspective and optical distortions are commonly occurred in photographs. Optical or lens distortion results from defect in camera lenses ocular design. Perspective distortion occurs when the camera’s position with respect to the image’s subject is not proper or subject’s position inside the picture frame is bit disoriented.
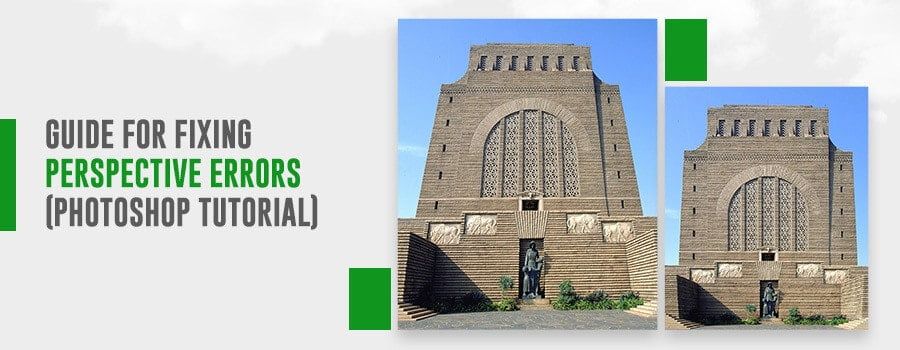
Different Types of Distortions & Perspective Errors
Before proceeding to correct the distortions in Photoshop, it is important to learn the various distortion types which exist under the two broad categories.
Optical distortion is usually of 3 types:
- Barrel Distortion
- Pincushion Distortion
- Mustache Distortion
Perspective distortion can be classified under 4 categories, namely:
- Vertical perspective distortion
- Horizontal perspective distortion
- Angle perspective distortion
- Scaling perspective distortion
Apart from these, we also come across parallax which is perspective error. Every day we come across this error while observing things. It occurs because our brain makes the objects nearer to us appear bigger compared to those objects which are far away from us. Cameras too, take into account the perspective when capturing images. As the object moves away from the lens, its magnification factor changes.
Correcting Perspective Errors in Photoshop
Now that you know about different distortions, it is time to understand how to carry out perspective correction in Photoshop. Prior to that, you need to keep in mind that, common distortion issues occurring during photographing of structures happen due to perspective error and camera’s barrel distortion. By investing time, you can patiently fix the issue.
For correcting barrel perspective distortion in Photoshop, we have to use ‘Lens Correction Filter’ on image. The filter has access to the profiles of various cameras and would intuitively apply suitable profile to your image. This corrects barrel distortion.
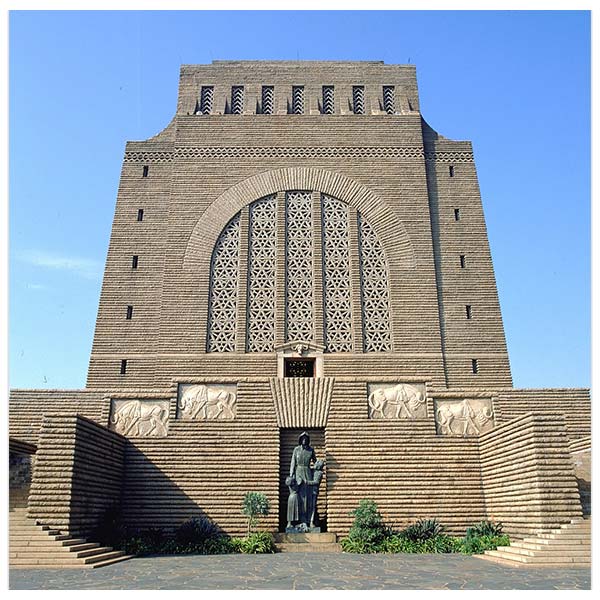
For fixing perspective distortion, you have to navigate to ‘Filter-> Lens Correction’. In the dialog box that appears, you can see the preview of the image on which correction has to be applied. Just beneath the image, essential information regarding the camera’s model and make as well as lens model type is displayed. The information is used for loading proper camera profile for correction of barrel distortion.
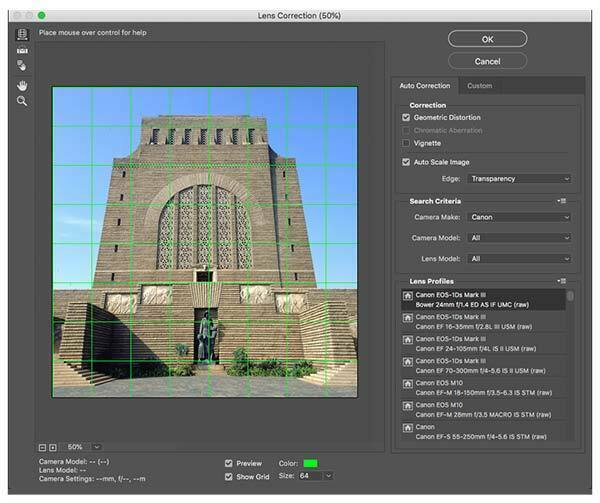
In the dialog box, two options are available; Preview and Show Grid respectively. You have to enable both options. The grid color should be selected carefully so that your image is visible against it. The default size of 64 can be maintained.
You would come across two tabs at extreme right panel. These are ‘Auto Correction and Custom’. Upon directing your attention to the top, you would find that ‘Geometric Distortion’ is enabled in ‘Correction’ section although completion section is grayish in color. Just beneath that, you will see that ‘Auto Scale Image’ option as well as ‘Transparency’ (beside the Edge option) are checked by default. A small box can be seen by the side of Search criteria below that. Upon clicking the box, you would be provided with two options i.e. ‘Match Image Sensor Size’ and ‘Prefer Raw Profiles’.
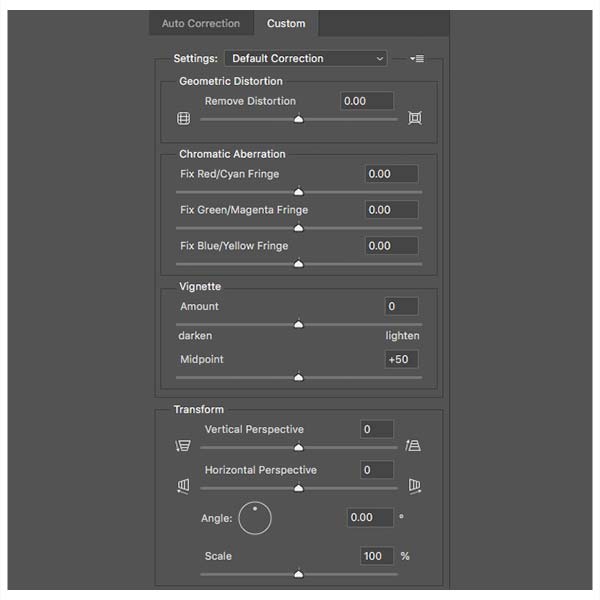
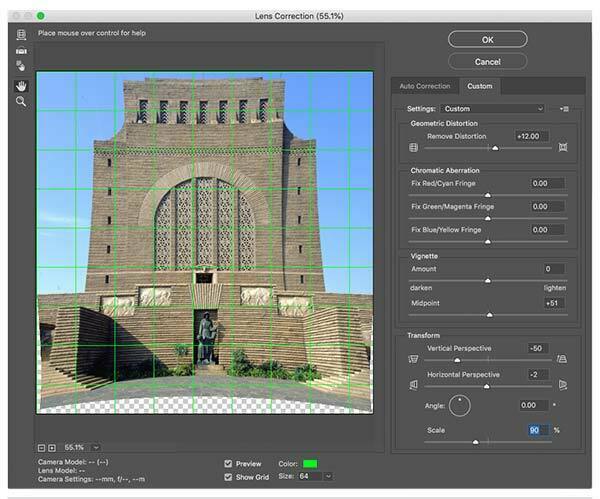
To correct image distortion, you are not required to use all the options. You just need to focus attention on ‘Transform Controls’ and ‘Remove Distortion’. Navigate to ‘Settings -> Default Correction’. A tiny pop-up square sit to the right of this setting. Loading or saving of settings can be applied from here. The grid that we had added earlier to the image would now come into focus as we would go about removing the distortion. If the structure in the image is leaning on a side, the same would be rectified too. The grid would allow you to check if removal of barrel distortion has been accomplished satisfactorily.
After barrel distortion correction is done, we would move ahead with perspective correction of the structure. You have to frequently switch between the various settings. This is because during the course of perspective photo correction, barrel distortion may get affected. After you have applied the settings as discussed earlier, you can quickly and easily rectify perspective error and barrel distortion.
Perspective Warp in Photoshop
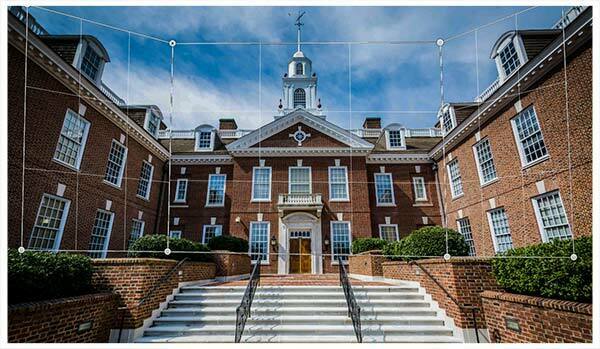
For fixing the perspective error related issues which show up during photographing buildings, you can use ‘Perspective Warp’ feature which was introduced in Photoshop CC.
For fixing perspective, navigate to ‘Edit -> Perspective Warp’. Once you have done so, the cursor assumes a new icon. After you have clicked on the image, a grid consisting of nine sections gets created.
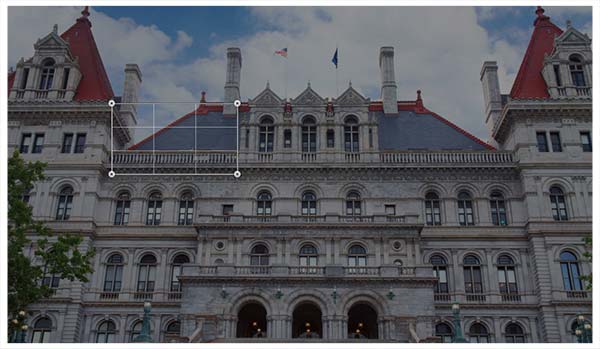
The control points within the grid lies along the corners. You have to manipulate them so that the complete building is encased. After doing this, navigate to menu bar for clicking the Warp button.
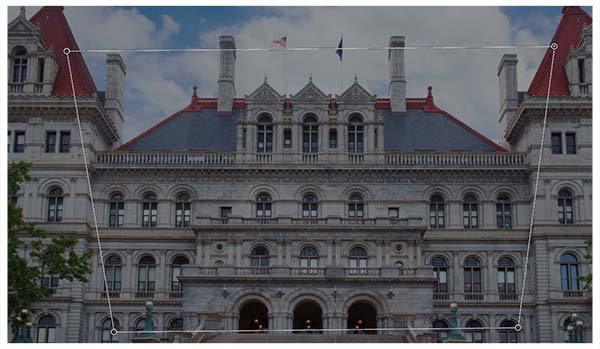
This would cause the grid to disappear and make the control pins active. You can drag the pins for straightening the building. Guidelines can be used for achieving optimum accuracy. After the changes done by you seem satisfactory, you need to tick the check mark sitting on menu bar. All the changes made by you would be applied on the image by Photoshop.
Solving Multiple Perspective Issues
It is possible that you may come across multiple perspective errors within the same image. The Perspective Warp tool would be used but you have to use extra control pins.
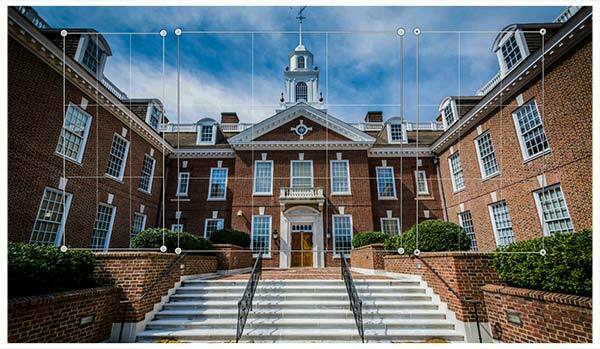
Start by drawing three quad shapes over the image.

Click on 1 control pin at corner and move it in a manner that it gets overlapped with control pin of next quad shape. This would also highlight the shapes. After releasing the mouse button, you would find that the 2 quad shapes have snapped together as a single shape.

The process has to be repeated with the last quad shape which would cause all 3 of them to be snapped together.
Next, you can go about fixing the perspective. For improved accuracy, the control points are to be aligned with guidelines. Perspective correction can prove to be a tricky affair for images with multiple issues. But, accuracy of a higher degree can be achieved with the help of guidelines.
During movement of the mouse while dragging the control pins, the pins may move excessively. If this happens, ensure that the control pin remains active, and then it can be precisely positioned using arrow keys of the keyboard. After all adjustments have been done satisfactorily, you can apply the changes by clicking on the menu bar’s checkmark. If needed, you can get the image cropped later on.
Conclusion
By now, you must have got a fair idea of how to fix distortion in Photoshop particularly perspective errors and barrel distortion. You can combine the techniques discussed above for more accurate and comprehensive errors. The techniques are particularly beneficial in the case of real estate photo editing as buildings often suffer from optical or perspective distortions during image capturing. Happy editing.