Clipping path techniques using Photoshop
What is clipping a path?
When other techniques fail, a clipping path is an effective Photoshop tool that enables you to “clip” or remove an object from its background. This technique is especially helpful when a product is displayed against an intricate or colorful background.
To adjust the image on to another background or file, innovative techniques are to be used. Just assure that you are working not on background layer but on a layer. For making the background a layer, double click on the background while you press the Alt Key.
There are a lot of steps involved in the process of photo clipping. Here in this clipping path Photoshop tutorial, the most prominent among them are brought to light.
Open a new photo
create a layer in Photoshop
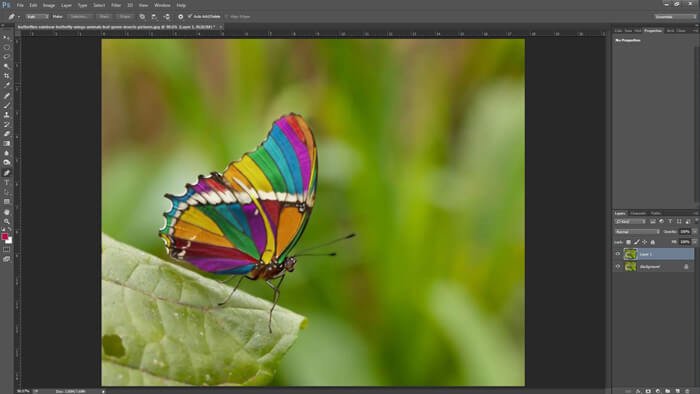
Making use of this technique to remove background is not a herculean task the concerned image. First of all, simply open a new picture into Photoshop or else drag and drop. Create a duplicate of the background layer before you start. Move on to the Photoshop toolbox to the screen’s left side. In case if you can’t still see it, from Windows menu, select tools. Make use of Pen Tool as it is used specifically for the process of path clipping. Followed by it, select a shape layer and path for the picture.
Around the photo clip by using Pen Tool
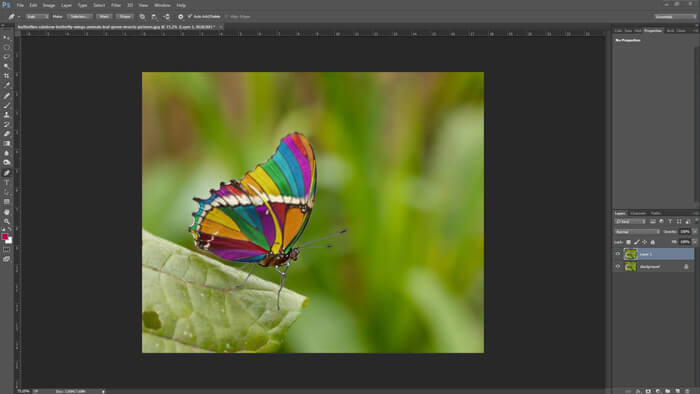
Clipping path using Pen tool
Using Pen Tool, mark out around the photo very finely. On selecting Pen Tool, the point over off your mouse will resemble a pen. Click on to the image edges and the anchor points to take the entire picture in till the initial anchor point is reached. Now the whole image is successfully selected. Deleting and modifying changes are facilitated by Anchor Point Tools. A professional company offering clipping path service is well acquainted with the best tools to use and at the right time.
Save the clipping path done
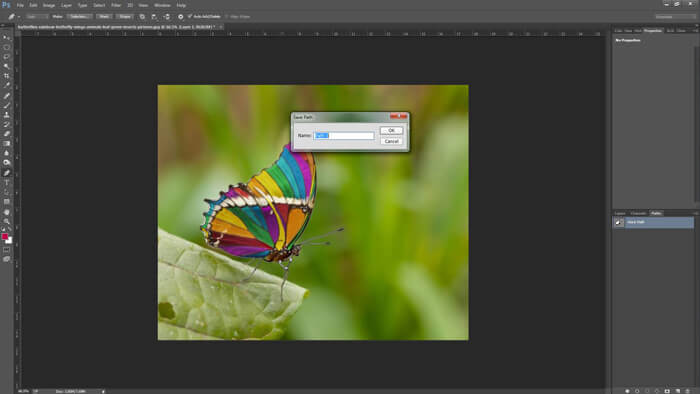
Creating Clipping path
Besides Pen Tool, there are Path Layers. On the layer, double click and it will change to clipping path from the working path. You will now get a box opened and saving can be done by Path and the default name will be Path 1. Now for removing the existing background and adding a white one, Ctrl + Click would work for Windows. The same can be achieved in MAC by pressing command and then clicking. After that select Layer followed by Layer via Copy in the Menu Bar for saving it to the white background. This is one of most important among the advanced clipping path photoshop techniques.
After clipping Photoshop add drop Shadow
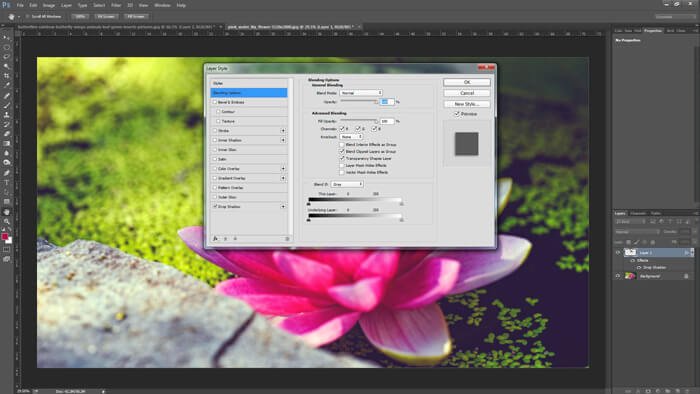
Creating a drop shadow
You may add a natural drop shadow to the image for giving it a more authentic and iconic look. From the Layers Panel, choose the layer for which the shadow needs to be added. At the Layers Panel bottom, there is Layer Style button; click on it. A list will appear from where you can choose the Drop Shadow option. With this the process is over.
WBZ is a globally trusted name among photo editing service providers. Photo clipping is in fact one of our main fortes. For more details in this regard, you may contact the team directly. We have different packages in place and the rates charged are reasonable.


