Photoshop is one of the easiest tools to use when it comes to color change or replacement. However, due to the vast number of buttons and options available, individuals might get a bit overwhelmed while using it. However, by following this easy guide, you will get to know how to change color in Photoshop and the tools that can provide you with the best results. Apart from this, you will also learn how to change the tones for PNG icons or specific image selections by using options like hue, saturation, or blend mode. Carefully going through the article will also offer you some tips to achieve realistic looks on your images even after the manipulation process. So, now let’s get started with learning about the basic color changing tools in Photoshop.
Basic Tools for Color Change in Photoshop
There are two basic tools that can help you to change color in Photoshop, i.e., Color Replacement tool and Color Range Command. You can use to former for a quicker and easier approach. However, individuals, who are a bit more acquainted with advanced techniques, can use the latter. Go through the tools and panel to understand what they are capable of and how can get the most out of them.
-
Color Replacement Tool
The Photoshop color replacement tool works by taking samples of the original tone and then, replacing it with the foreground one. The advantage of using it is that it perfectly maintains the shadows, highlights, and mid-tones of the original image so that the changes look completely realistic. To use this tool, you need to go to the Tools panel. Now, select the Brush Tool option and right-click on it to find it under the flyout menu. For Photoshop CS – CS2 users, the location can be a bit different. They can find it on the Healing Brush Tool’s flyout menu.
-
Color Range Command
People who are looking for a non-destructive method or much flexibility with tone manipulation in Photoshop can use this tool. Just like the magic wand tool, you can make a selection depending on the tonal values. However, unlike it, you can choose specific tones for your whole image. You can even make a pre-existing selection instead of using pixels that are adjacent to the point of selection. Various options are available for making the selections, i.e., by using a color picker, a pre-defined range of RGB and CMYK, a tonal selection of mid-tones, highlights, and shadows, etc.
How to Change Color in Photoshop: Different Ways
Check out the best ways to learn how to change color in Photoshop in the overall image or a particular selection.
-
For a partial color change
In this case, you can change the tone in the image while blending it evenly. So, get started by using a photograph and follow the below steps.
Step 1: Click on the Quick Selection Tool while making a particular selection around a solid background. Inverse the selection by pressing Ctrl/ Cmd +Shift +I so that the dress is selected.
Step 2: Copy the selection by pressing Cmd/Ctrl +J and paste it to the new layer.
Step 3: For start with the manipulation process, you first need to adjust the hue saturation by pressing Cmd/Ctrl +U. Now, you can change the tone, and get the desired one by moving the hue slider.
Step 4: To blend the tone, you need to add a new mask to the layer by clicking on the add layer mask button. You can find it on the layer panel to the right of fx.
Step 5: Select the gradient tool. Now, set it to foreground, background, linear, normal mode, and 100% opacity.
Step 6: To create a seamless blend, horizontally drag the gradient with the selected mask through the photo.
-
For changing the background color
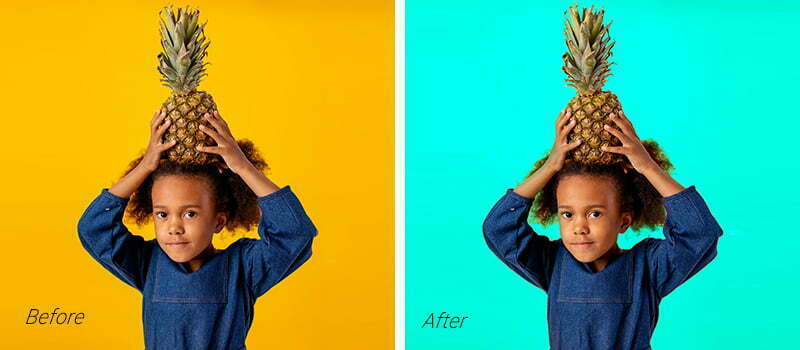
Sometimes, you may only need to change the background color, which can go wrong if you make any unnecessary selections. Here’s how to change background color in Photoshop in the most appropriate way.
Step 1: Create a saturation or hue adjustment layer.
Step 2: Go to the properties panel. Now, select the finger present under the preset. Select the yellow tone, and you will notice that the sliders in the gradient have turned yellow. Otherwise, you can directly select yellow from the drop-down button. However, it won’t be that accurate.
Step 3: By moving the hue slider, you can only see the yellows changing. Now, choose any tone you want.
-
For manipulating the color of an object (e.g. Changing color of clothes)

The technique is similar to the previous one. However, in this case, you will learn to tighten the tone and address the already changed areas that you did not want to be changed. Follow the steps mentioned below to learn how to manipulate the color of cloth in Photoshop.
Step 1: Create an adjustment layer for saturation or hue. Click on the finger as well as the red coat for sampling the tone.
Step 2: Start moving the hue slider for changing the coat’s color. You will see that the skin and hair color also changed as a result.
Step 3: Therefore, to refine the selection, you have to move the sliders in gradient. A few things, such as lips and face reflection, might not be fixed in the process.
Step 4: The saturation or hue will present a layer mask. Now, select the brush and change the foreground to black. By keeping the mask selected, you can paint any area in the image for restoring the original tones.
-
For painting a new color (e.g. re-coloring a car)

Check out the steps for learning the best way to paint colors with freehand and employing selections for assistance.
Step 1: For selecting the tone of the car paint, you need to click on Select and then, click on the color range. Now, choose the main color with the help of the eyedropper and add it to the selection. The fuzziness slider present there will help you to refine the selection. Once you are done with that, select OK.
Step 2: To activate a quick mask, press Q. A red overlay will be seen, which indicates the selected areas.
Step 3: For adding to the section, paint it white and for subtracting, paint it black.
Step 4: Make a new layer and switch it to the color blend mode.
Step 5: Now, choose a paint brush with selection active. Move to the swatch of foreground and select a particular tone to carry on with the painting task. Make sure you do not change the tones. The advantage of using the Color Range option is that it also changes the tones of reflection. Thus, not only Photoshop replace color on the images but also helps to cast a realistic appearance in Chrome.
Step 6: Select saturation or hue for instantly changing the newly painted payer.
-
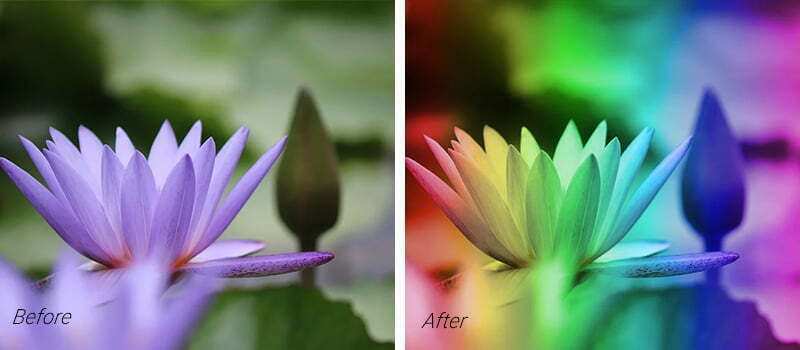
For adding color grading and overlays

Here’s how you can add grading or overlays to the images.
Step 1: Go to the Gradients panel and drag a gradient over the photograph. In the Layers panel, tweak to a suitable opacity and go for the color blend mode. Images with low opacity generally provide a realistic look.
Step 2: Now, select a gradient map and go for the same gradient, like before. The orange tone to the gradient’s left is shadows and the red to the right is highlights. Now, change it to the blend mode.
Step 3: Select the reserve option to turn the orange to highlights and red to shadows. It looks better when highlights are represented in light tones. Now, decrease the opacity to see an even better image. If needed, combine the gradient map with gradient overlay and change the opacity on both the adjustment layers accordingly.
-
For adding a color overlay effect with scaling gradients
Scaling gradient is a variation of gradient overlays. Here, you need to use an adjustment layer with gradient overlays in the place of a gradient layer. By doing this, scaling the layer and changing the angle will be easier. Besides, you can also drag the gradient on the picture with an open Gradient Fill box.
So, the above was all about changing colors in a photograph but what should be done if you need to change the color of a PNG icon. Let’s move to the next section to learn how you can do it.
How to Change Color of a PNG icon in Photoshop?
Take a look at the steps below to learn how to replace the tones of raster icons using Photoshop.
- Step 1: Select the desired icon and drag and drop it in Photoshop. You can also press Cmd +O for opening the file.
- Step 2: If the icon is grayscale, you will find the shades in gray. For changing it, go to the menu bar and change the color mode to RGB.
- Step 3: Check if the Layers panel is present on the screen. If it isn’t, then go to Windows and click on Layers for opening it.
- Step 4: Click on the fx icon for adding the desired effects.
- Step 5: Now, select Color overlay from the Effects menu, and a dialog box will appear on the screen.
- Step 6: Click on the color box that is present in gray.
- Step 7: A color dialog box will appear. Now, choose any tone of your choice.
- Step 8: If you are satisfied with the result, then click on the OK button for all dialog boxes. Now, go to the File menu and click on the Save button for saving the PNG file.
- Step 9: Now, adjust the file preset to PNG-24.
- Step 10: Finally, click on save and the process of icon re-coloring is complete.
Hope the article was really helpful and provided the needed insights on how to change the color of something in Photoshop. Besides, going through it might also help you learn the techniques to add stylized features to your images, subtly change the skin tones, or change background color in Photoshop. Since knowing color replacement and adjustment is in high demand today, you can utilize the tips to master the skill of manipulation quite easily. Be it a job requirement or simply tweaking your own images for fun, you can do it in the most professional manner.