You may want to eliminate the white background from a photo mainly because of two reasons. First, you may want to create a composite for which you need a cutout and second, you are looking for a transparent form of your logo. Fortunately, Photoshop comes equipped with a lot of features that would allow you to delete white background or any other type of background easily. What you should know is that the overall image quality and color will depend on the tools and techniques that you use to perform this edit. You can use The Magic Eraser or Background Eraser tool if the image that you wish to edit has only dark colors and no light colors. If you have to edit an image that has an elaborate background or lighter shades, you should opt for an advanced tool so that you don’t end up deleting important details by mistake.
In this article, we have given tutorials on how you can remove the background of an image using three Photoshop tools namely, the Magic Eraser tool, the Quick Selection tool, and the Background Eraser tool. What you should know is that transparency is denoted by grey and white checkered grid. So whenever you spot this grid, it would indicate a transparent grid.
Steps to use the Magic Eraser Tool
Using this tool is quite easy, just focus on the following steps and you would be able to get desired outcomes:
-
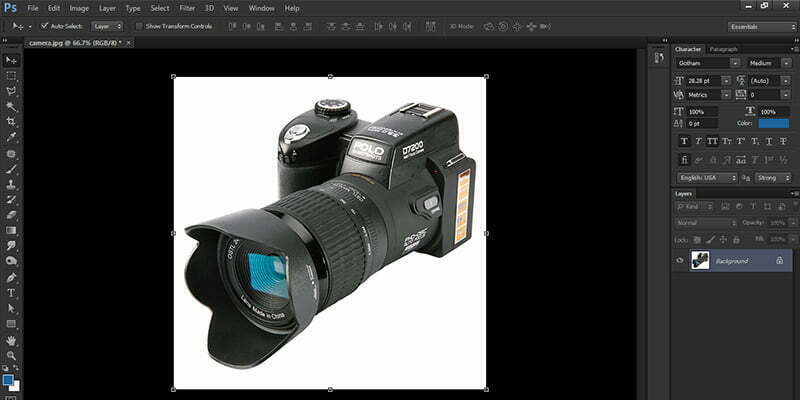
Click open the image
Use Photoshop to open the image that you would like to edit from a folder. Bring the image to artboard’s centre to perform editing easily.
-
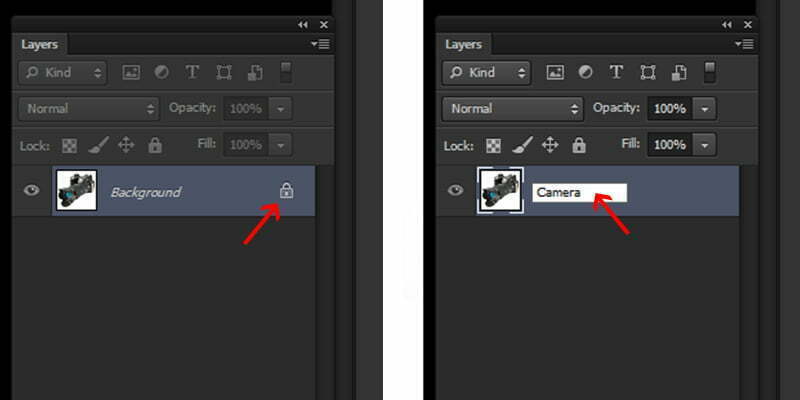
Let the layer be released.
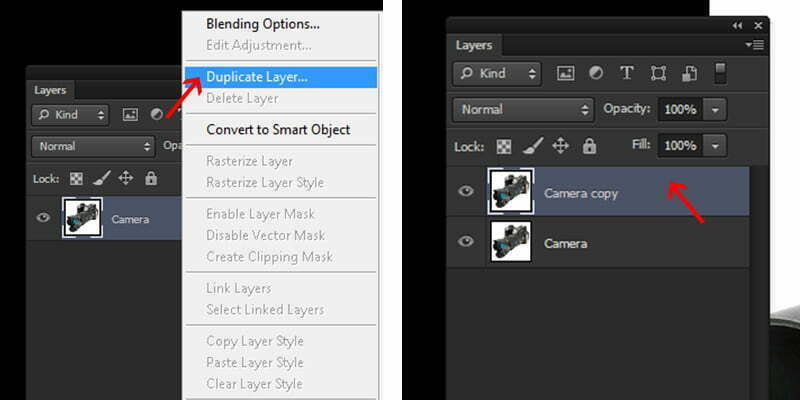
Go to the layers panel, release the lock so as to form an editable layer. You can give this ‘layer 0’ a meaningful name. A new layer can also be created through a duplication of the first layer and then concealing it by selecting the eye. This alternative step would be especially useful if you make a mistake that’s quite hard to rectify.
-
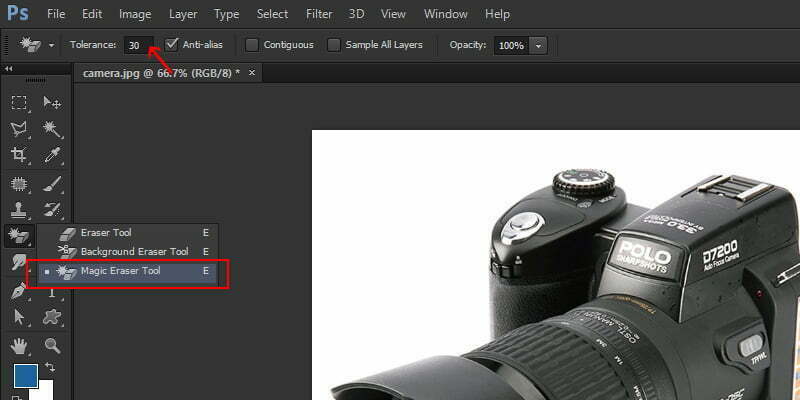
Click on the Magic Eraser tool
In the tools panel, click on the Magic Eraser tool. This is the Eraser tab’s third option.
-
Delete the Image background
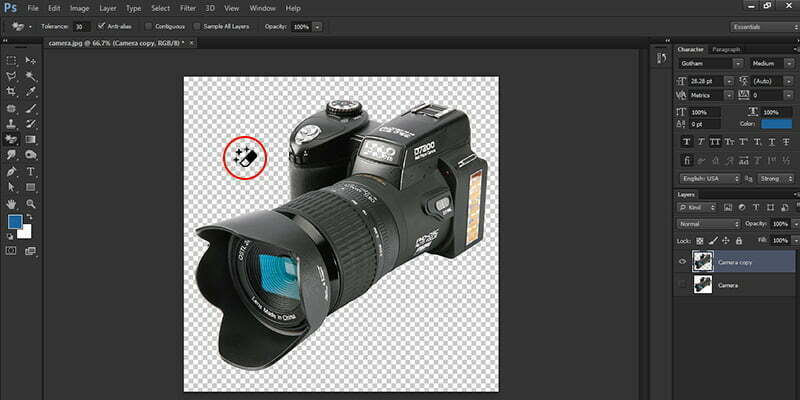
Just select the white background by clicking on it and it will disappear.
However, you should note that if an image features a lighter section, the Magic Eraser tool will also delete this section. This is the reason why the Background Eraser tool may prove to be a better option in this case.
-
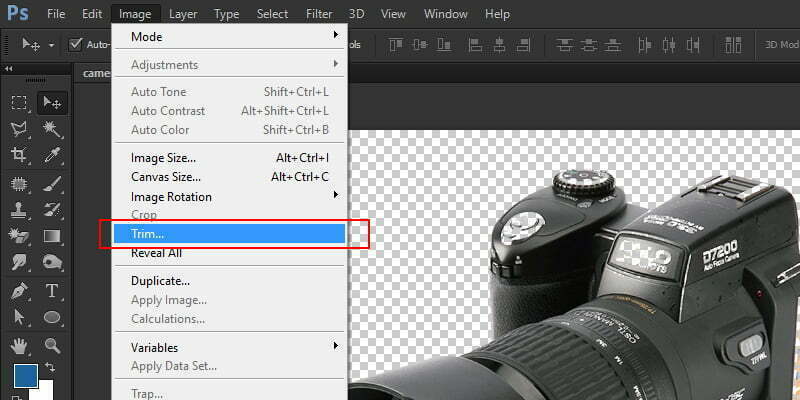
Reduce image size store the file in the PNG format.
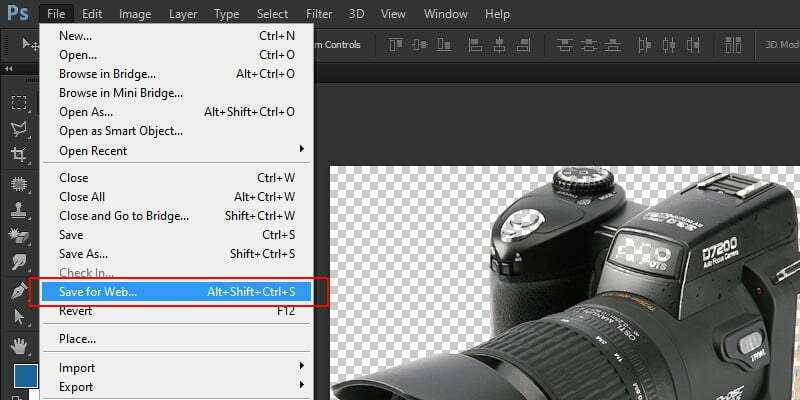
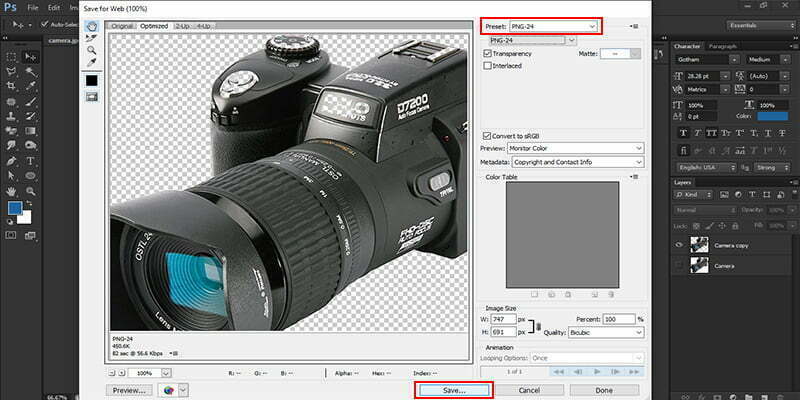
Below the image tab, you will come across the trim option. Click on that option. With this, you can remove the leftover transparent bits surrounding the cutout portion. Click on ‘Save for Web’ and choose the PNG format. If you choose the JPEG format, the image will get saved with the white background.

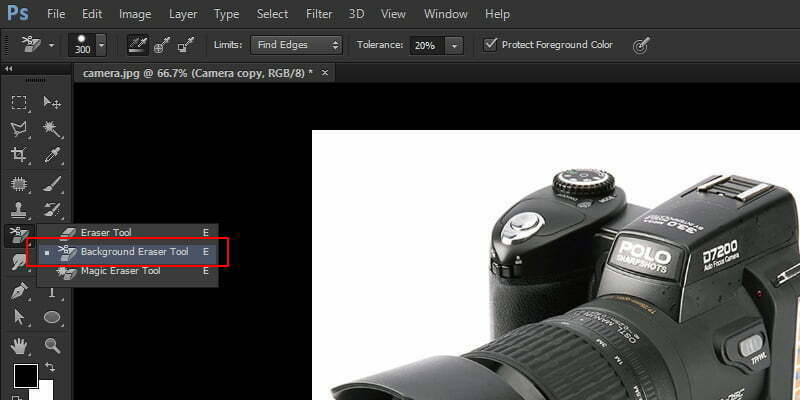
Using the Background Eraser Tool to Remove White Image Background
The first 2 steps remain the same for the Background Eraser and the Magic Eraser tools. So begin by following the same first 2 steps.
-
Click on the Background Eraser tool to select it.
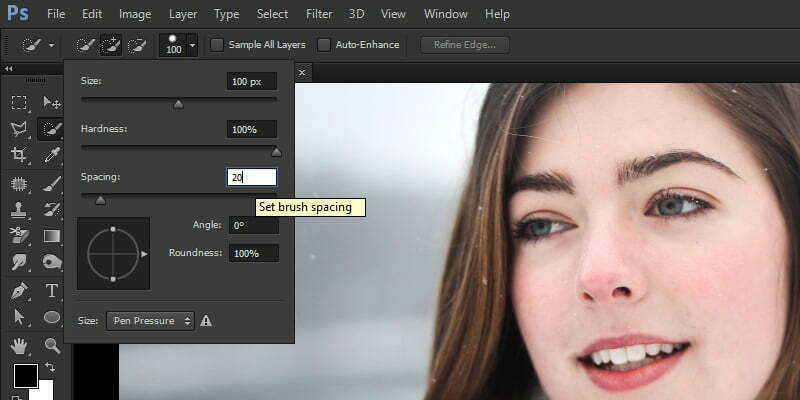
Go to the Eraser tab to spot this tool. The tool cursor bears crosshairs at its central portion and appears like a circle. You need to use these crosshairs properly in order to use the tool. These crosshairs selects the color that lies directly underneath. In the present case, these will sample the white background. Selecting appropriate preferences is the key to getting desired results. If we have to delete a white portion that lies just behind a vibrant portion, we should ideally select the size to be between 300-800 pt., a tolerance of 20 percent, ‘Find Edges’ as limits, and Once as the sampling option. You should also select “Protect Background Color” as a preference. The black color should in the foreground below the toolbar.
-
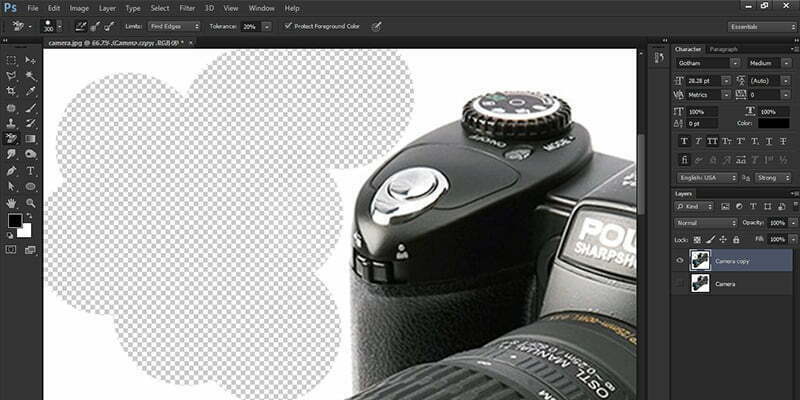
Deletion of the white background
Click the mouse button after putting the cursor on the white section. Continue to push the button and pull the cursor over the white section. We chose the 20 percent tolerance, so other colors would not get affected. If we choose a higher tolerance value, the other colors would get impacted to a small extent. You may want to opt for different tolerance values for different images. If a few white pixels remain, you can use the normal eraser to wipe them off.
The last 2 steps from the Magic Eraser tool should be followed now.
Using the Quick Selection Tool to Remove Image Background
If a white background appears cloudy or has dark edges, you would need a different tool over which you can exercise a greater degree of control. The Quick Selection tool is one such tool.
Here are the steps to use this tool
-
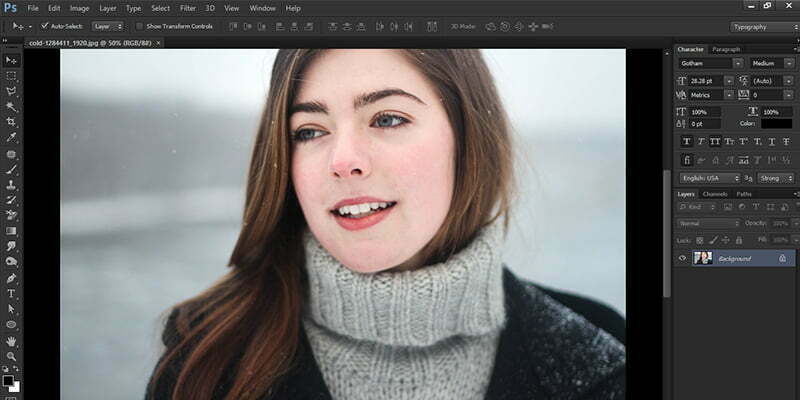
Click on the image to open it.
Open the image in Photoshop. Drag the image to the center of the artboard.
-
Go for layer duplication.
Create a duplicate of the image layer and then conceal the first layer by keeping it underneath the layer that you would edit. Give appropriate names to the layers for easier identification. This works the same way how the Magic Eraser tool works.
-
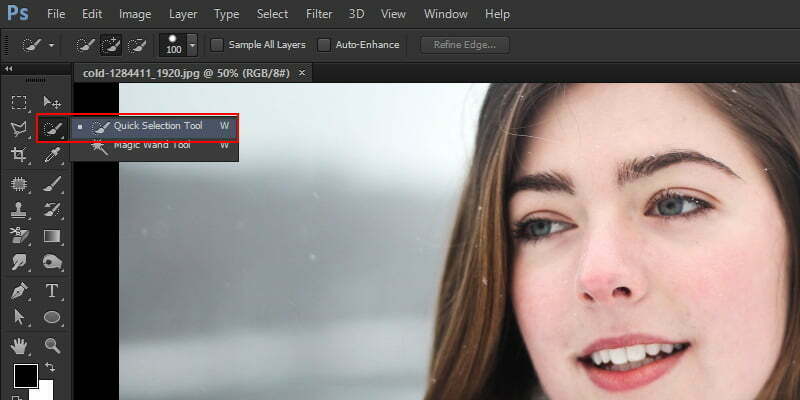
Click on the Quick Selection feature
Access the toolbar and select this option. This lies with the Magic Wand tool. Modify the cursor preferences accordingly, in the same way how you used the Background Eraser tool.
-
Choose the object.
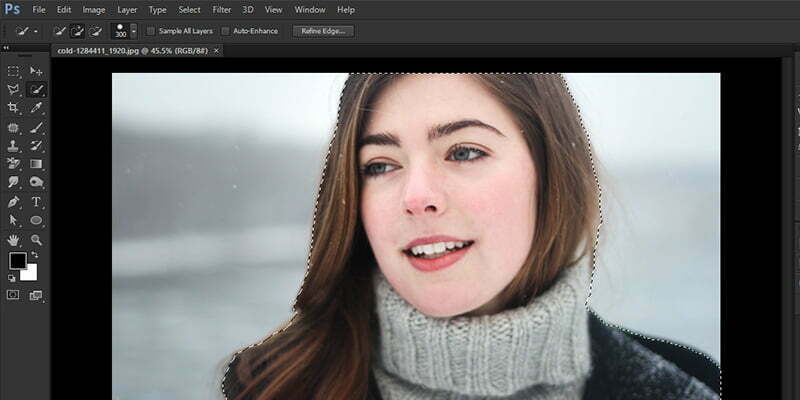
Continuing pushing the mouse button and pulling the cursor over the item that needs to be segregated from the background. With this, you would select the item and not the background. Position the cursor on the item and on the selection’s inner edges in order to set the limits. When you release the cursor, the preference bar options will change and you will be allowed to add or subtract anything from the selection only. The new selection will replace the existing selection.
-
Rectify the selected area.
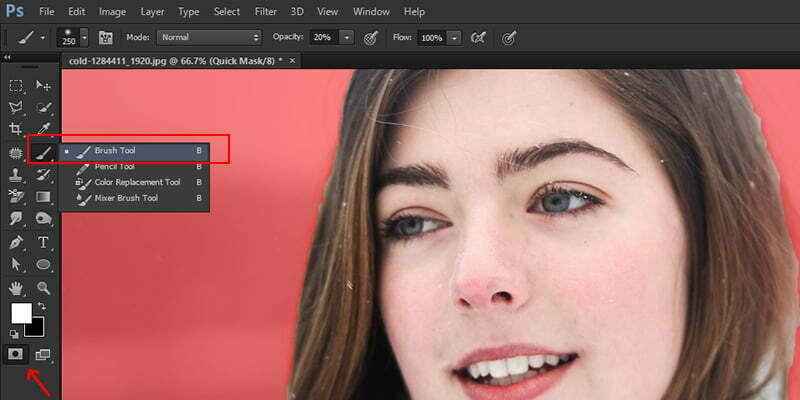
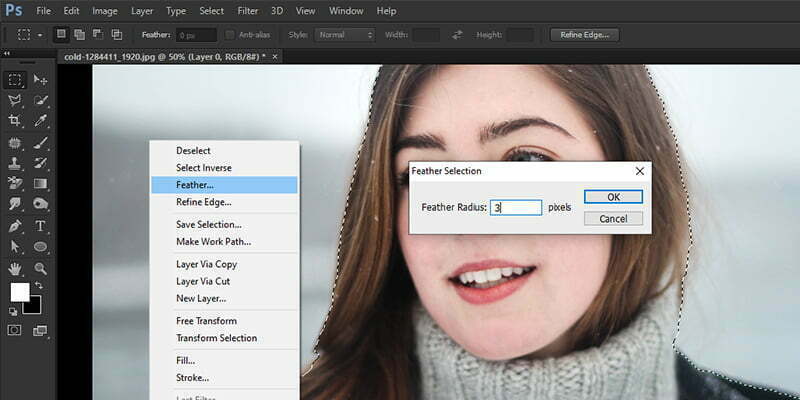
Use the brush tool to refine the selection. Press ‘q’ and you will find a red area in the image. This is the image’s unselected portion. Enlarge the image and select the Brush tool. Increase the selection by adding white and use black for unselecting. Decrease the size of the brush to properly refine the tricky edges and tight gaps. Click ‘q’ one more time to eliminate the red and view the selection in the form of dotted lines. Double click on the selected portion and select the feather option. Select ok after setting the feather to a value of 3.
-
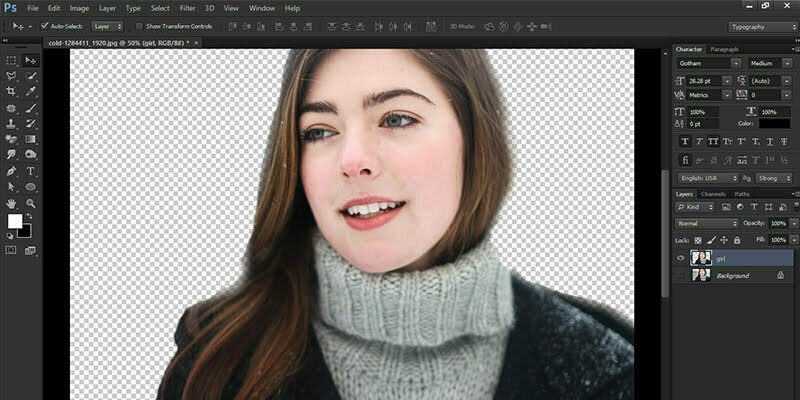
Reverse the selection.
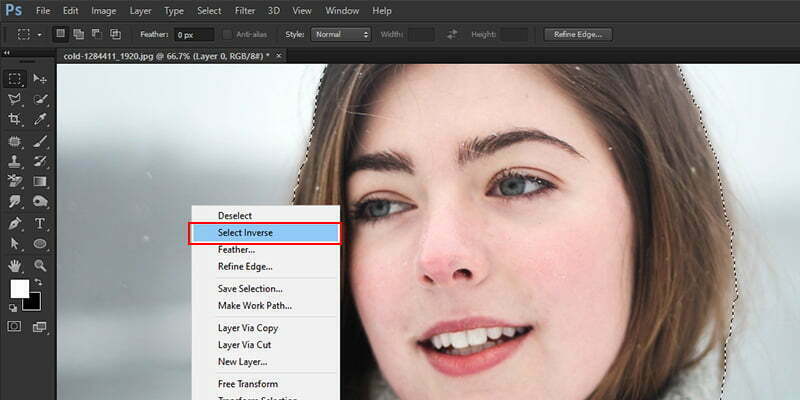
Turn the selection upside down when you feel that you have selected the object in an appropriate manner. Delete the background after selecting it and then the transparency grid will become visible. Release the red by clicking ‘q’, right click on the sample and then select the option ‘select inverse’. Treat the selection edges properly by applying a slight feather effect. When you reverse the selected area, erase it and the transparency grid will appear.
-
Next, follow the last two steps that you use in the Magic Eraser option
Most graphic designers or photo editors use the pen and the lasso tool to select background objects, but they need not use these tools if they have to remove a simple white background. Using these three tools that we have described above, you will be able to edit and remove any type of white background. Images with transparent backgrounds can be downloaded in SVG and PNG formats. In case you are not using an updated Photoshop version, you may consider using the free trial version on the Adobe Creative Cloud platform. Online image editors can also be used; however, they do not yield professional results like Photoshop.