benefits of 3d exterior rendering


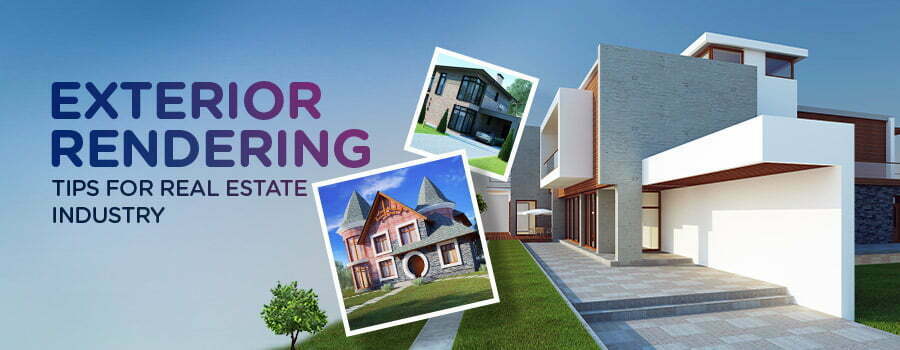
Recently, there has been an increased demand for exterior rendering services in the real estate industry. Flawless exterior renderings increase the potential of real estate developers to market their property to various clients. 3D rendering and visualization of images showcase the architectural building features to the respective clients. If you want to create better images, you need to focus on the elements that make a better rendering. From background images to textures, every aspect of the image has to be enhanced. There are in fact several benefits of 3D exterior renderings.

  • Position of sun and shadow

    When you produce an exterior rendering, it is necessary to get the sun and the shadow at the right positions. Failing to do so will make the image look unrealistic. Besides, you should focus on the intensity of sunlight, as too much brightness or underexposure will reduce the visual appeal of the image. The shadows should enhance the attractiveness of the building, so make sure to place it in the right position. Well, you can adopt the trial and error method to test out the looks of the image; this is what a typical 3D rendering service provider does. You can use the solar north plugin, which allows the users to set the direction of the shadow with precision.

  • Sky

    During the post-processing stage, plan the position of the sky in such a way that adds to the realism of the render. Correctly incorporated, the sky merges seamlessly with the background of the building, enhancing the visual appeal of the render. You can add cloud domes in the image with the help of any 3d modeling software. Well, you may not use a complete cloud dome in the image. A curved plane along with the image of the sky and cloud can look realistic. This will keep away issues related to tone-mapping during the post-processing stage.

  • Upgraded materials and textures

    The textures used in the images should look refined, as poor-quality textures mar the look of the entire render. Expert professionals offering 3D exterior rendering services are too particular about it. You need to configure your materials and select textures from the available options. Advanced software programs usually come with several high-resolution textures to be incorporated in the images. Besides, you can go for the pre-configured textures to speed up the process. In case you import images from other websites, take care to maintain a high resolution in the render.

  • Background image

    Adding the background image is one of the core tasks in the post-processing stage. You need to take adequate care at this stage, ensuring that the background and foreground images enjoy a good compatibility. The background should go well with the image both in day and night scenes when it. You may also go for multiple images, showing different seasons of the year. Well, the designers often choose from the panoramic backgrounds, present in the editing software and incorporate the same in the renders.

  • Reflections

    Reflections make the image realistic for outdoor 3d exterior rendering. Evidently, you need to get the reflections in the right place in your renders. For instance, if you have glass windows in your image, they are likely to reflect other objects in their vicinity. Besides, you should choose the right glass texture. Professional designers often add a background in the space behind the camera, so that it gets reflected on the glass. You can also pick a pre-configured reflected glass from the software. Reflecting trees, clouds and other objects in the glass enhances its appearance.

  • Trees and plants

    While integrating the background around the image, go for 3D vegetation. These look livelier than the 2D plants. Well, three-dimensional trees use a greater amount of memory and therefore, take a longer time to render. It is a common practice among 3D rendering services providers to use these trees in the foreground and integrate 2D vegetation in the background. Well, take care to avoid repetition with your planting. The same pattern of trees in different areas will look unrealistic. You can use the ‘rotate’ and ‘scale’ tools to make them look different.

  • People and cars

    It is recommended to add people and cars in your image, as they bring life to your 3D walkthrough. These elements contextualize the buildings and residential spaces to reality. Focus on the minute elements in the render, for instance, you can add a number plate to the cars, which can go a long way in crafting the overall ambience of the scene.

  • Grass

    Making the grass look realistic might turn out to be a challenge. You should use the right texture in the grass. Try out various textures in your image and check out the one that suits it perfectly. Integrate the right scale in the grass, ensuring that these do not look repetitive. Well, you can change the colour of grass, which can bring about variations in the contrast of the image. You can also create subtle variations in the ground, which makes the 3d visualization look real.

  • Precise height of the camera

    When you set up your camera view, take care to fix it at a normal height of the eye. You must compose the image accurately, ensuring that the frame is well-balanced on all its sides. Placing the camera too high may affect the image, making it look odd, and robbing it of its realism. Follow the rule of thirds in the image, although it is not mandatory to integrate it. Apart from this, you need to set the field of view with accuracy.

  • Incorporating the details

    Clients expect a detailed view of the render, so include the right amount of details in the image. However, take care not to overload it with objects. Focus on the delicate aspects of the image like reflections, rainwater pipelines, curbs on the roads and so on which is something in which professionals engaged in architectural 3d exterior rendering service excel. You can add details to the roofs, windows and other areas in the image. These minute details make the image look more realistic.

How Can You Harness the Power of Exterior Visualization for Property Marketing?

The real-estate industry is unconditionally emerging as the most competitive one of all time. So it urges the property owners to push off with the best foot to stand high and get on the top list. And with technology being the crucial element, CGI images keep the industry stable. 

It’s time to think of 3D exterior rendering as the best option to enhance the visualization of your property. 

Let us see how you can utilize it better. 

  1. Super cool property visualization

    How do you get the first impression of your property? With a stunning photograph that catches the eyeballs of the user. Exterior renderings are the most crucial here. You must rush to make your property exterior rock for the best result. The photorealistic visualization says it all.

    One thing to note here is that only if the user is impressed with the exterior design will they opt for the interior option. So, the sooner, the better. So, first, have an excellent exterior visualization to get the best, and then look for interior concepts.

    Sounds helpful?

  2. Even the minute features will never be minute again

    That shows the power it has. With feature-rich 3D exterior rendering, you can highlight even the tiny feature you may have neglected in the actual picture. It is much more powerful to showcase all the features that make the image visually appealing. Decision-making becomes easier.

  3. Marketing campaigns in the next level

    You get good results if you market your property to a broad target audience. But how to initiate marketing campaigns? 3D rendering images help you to reach a much wider audience with the stunning visuals of your property. The best part is that they see something beyond standard property images.

  4. Cost factors

    Are you struggling to negotiate prices? No worries, with 3D exterior rendering, it becomes much easier for you to stay at stable prices because you can very well illustrate the features in-depth, which helps you in deciding the 3d design cost factors.

Most of the time, the trial and error method comes in handy in developing these images. Focus on the areas mentioned above to make that image more realistic. In addition, you may reach out to the experts for professional support while developing the exterior renderings of your projects.

Try 3D exterior rendering and experience the difference it can make for your real-estate business.

Want to know more?